
LEAVENWORTH PAINTING · KANSAS
Historic home painting in Leavenworth, KS
Historic-home painting should protect the woodwork while keeping the details that make the house worth caring for. Original clapboards, narrow window muntins, porch columns and layered trim need a plan based on their condition. A fresh color cannot compensate for loose paint, damaged joinery or water entering behind the finish.
Leavenworth Painting is a starting point for repainting an older home’s exterior and coordinating the painting scope with needed repairs. Get a Quote with the approximate house age, surfaces you want painted, known problems and your priorities. If you have original windows, decorative woodwork or a property with historic designation, include that in the project description.
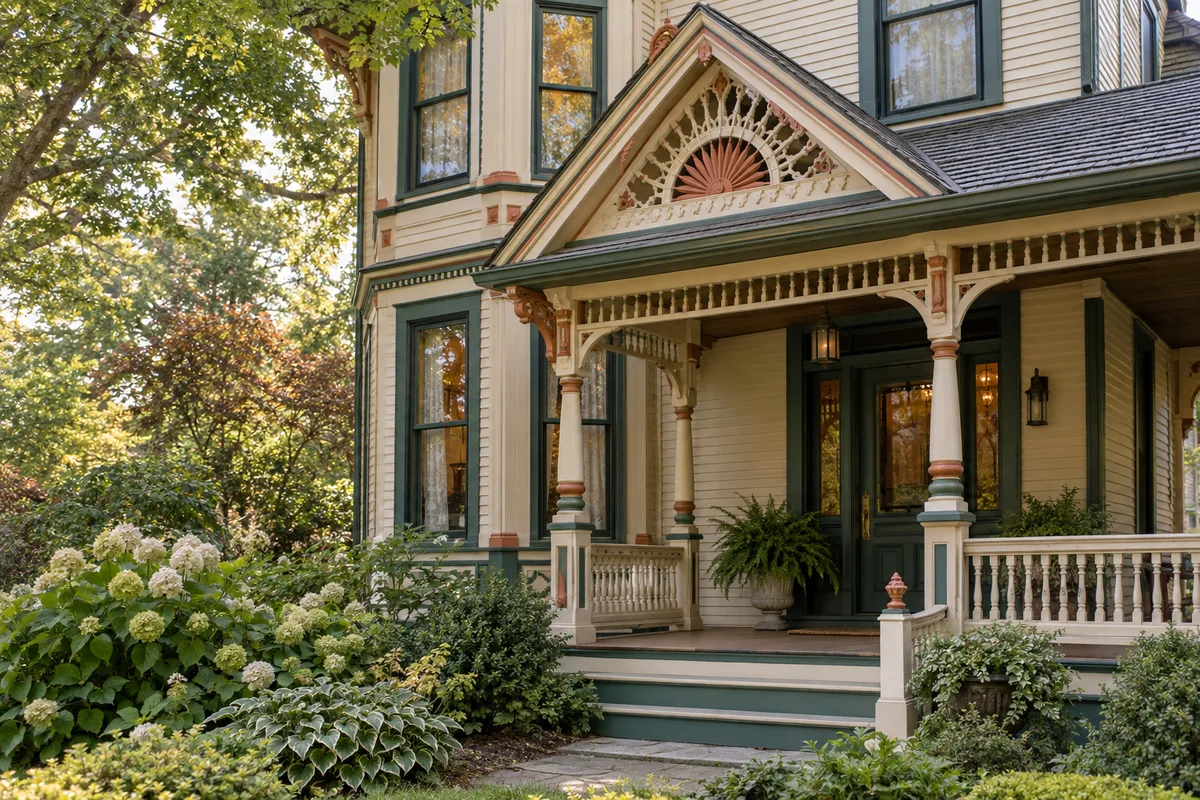
Begin with the features you want to keep
A useful first conversation identifies what matters: retaining original siding, improving the street-facing trim, preserving a porch, changing colors or addressing repeated peeling. Those priorities help separate a maintenance repaint from a much larger restoration project.
List original features, known replacements and areas whose history is uncertain. An older house can contain solid wood, later hardboard, newer fiber cement and metal trim on different additions. They may look similar after painting but require different preparation.
Describe the desired finish honestly. Sound old paint layers, wood grain and carefully repaired surfaces may remain visible after repainting. A uniform color is a different goal from making every surface look newly manufactured. A sample area lets you compare preparation options before paying for the same treatment across the house.
For a straightforward repaint on newer siding, our exterior painting page covers the broader material choices. This page focuses on the decisions that matter when retaining older woodwork and architectural details.
Assess paint, wood and water separately
Peeling paint is a reason to inspect; it is not proof that the wood must be replaced. Equally, a smooth painted face does not prove that the material behind it is sound. The assessment needs to distinguish the coating from the component it covers.
| Area | What to record | Decision before painting |
|---|---|---|
| Clapboard siding and corner boards | Paint adhesion, damaged ends, missing pieces and previous patches | Retain and prepare sound material; define local repairs or replacement |
| Window sash, frames and sills | Coating, glazing, wood condition and operation | Separate repainting from glazing, joinery, glass and operating repairs |
| Fascia, eaves and cornices | Failed finish, staining, loose details and adjacent roof drainage | Resolve water entry and attachment problems before finishing |
| Porch columns, railings and steps | Deterioration, movement, missing details and contact with water | Determine whether repair is cosmetic or involves structural support |
| Previously painted masonry | Existing finish, moisture, salts and mortar condition | Assess the masonry and coating before specifying a repaint |
Photograph the same areas from an overall view and close up, without scraping or probing old coatings yourself. Note when symptoms occur: after wind-driven rain, near a gutter overflow, or through several seasons. A record is especially useful when the problem returns after each repaint.
The National Park Service’s moisture guidance for historic buildings recommends diagnosing the moisture source before choosing a treatment. Water can travel from its entry point, so the visible stain or peeling patch may not mark the source. Where needed, building repairs should precede painting.
Set the lead-related scope before disturbing paint
For pre-1978 housing, discuss the lead-related work requirements before scraping, sanding, stripping or repairing painted components. The Kansas program has requirements that differ from general federal advice.
For covered renovation work, verify the appropriate firm licensing and individual credentials through KDHE’s licensing and certification resources. A painting quote should identify who is responsible for the regulated work, protection, cleanup and required records. General painting experience does not establish those credentials.
KDHE’s Kansas RRP FAQ prohibits heat guns and test kits used to determine lead in surface coatings under its program. It also limits paint-chip sampling to a certified lead inspector or risk assessor employed by a licensed lead activity firm. Do not use a hardware-store test or an old preservation article to decide that a disturbance method is permitted.
Our Leavenworth lead-paint guide explains the assessment and contractor questions in more detail. Resolve those arrangements before setting the preparation method or final schedule.
Remove failing paint without making bare wood the default
The purpose of preparation is a sound surface for the next coating. It is not automatically to remove every historic paint layer. Extensive removal increases the work and can sacrifice evidence of earlier finishes or damage fine wood profiles if the method is unsuitable.
The National Park Service’s exterior woodwork brief distinguishes conditions needing cleaning or limited removal from more severe failures. Its preservation principle is useful: assess the failure and use the necessary treatment, rather than assuming complete stripping is always better. Current Kansas lead requirements and current product instructions govern the actual work methods.
Agree on a prepared sample that includes a typical coating edge or damaged area. It should show what will remain visible after the proposed treatment. For carved brackets or narrow moldings, the goal also includes keeping the profile readable rather than rounding it off in pursuit of smoothness.
The written scope can distinguish local preparation, broader removal where adhesion has failed, and any specialist work that needs separate pricing. See the wood-siding preparation guide for a fuller explanation of those choices.
Specify primer by the wood and existing coating
The age of the house does not, by itself, select the primer. Bare wood, a sound painted surface, a stained patch and a repaired component can require different treatment. Name the primer and its purpose for each condition, then check compatibility with the selected finish.
Cedar is a useful example. The Western Red Cedar Lumber Association recommends a suitable stain-blocking primer for opaque finishes, recognizes both oil-based and water-based formulations, and recommends acrylic latex paint as a finish option. “Old wood cannot take latex” is not a sound general rule.
A primer may address adhesion or staining, but it cannot strengthen a loose coating layer or solve water entering the assembly. If a stain returns, investigate its source rather than simply adding another stain-blocking coat. Our exterior stain guide explains why brown marks do not all have the same cause.
Record the exact product, sheen, color and coat plan in the quote. The exterior paint guide helps organize that discussion without treating one product line as the answer for every old house.
Decide which wood repairs belong in the painting project
A repair plan should identify components and locations, not promise to “fix all rot.” A small defect in decorative trim is a different problem from a deteriorated porch support or a loose connection. The appropriate repair depends on the remaining material, the component’s function and the cause of deterioration.
Ask for each identified repair to be categorized:
- Preparation repair: a defined surface defect addressed as part of the paint preparation.
- Carpentry or component repair: a damaged section, loose joint or missing detail requiring a specified repair before finishing.
- Specialist or structural assessment: a component whose support, attachment or extent of hidden damage needs evaluation beyond painting.
Epoxy repair is one possible method in suitable circumstances, not the automatic answer to every soft spot. Where replacement is necessary, discuss the profile, dimensions, reveal and relationship to neighboring pieces. “Similar trim” can look very different once repeated across a porch or cornice.
The repair scope should explain preparation of replacement material and cut ends according to that material’s requirements. Do not transfer solid-wood finishing rules to every modern replacement product. Agree on how newly exposed damage will be photographed, priced and approved before additional work proceeds.
For details that matter visually, request a small drawing, labeled photograph or actual material sample before replacement. Keep any designated reference piece until the repair is accepted. That makes the appearance decision part of the scope instead of leaving it to a final walkthrough.
Original windows: define painting and restoration separately
“Paint the windows” can mean exterior casing only, frames and sills, sash, or a much larger restoration. Identify each window and the parts included. Exterior painting does not automatically include the interior face, storm windows, glass replacement, sash removal, cords, weights, locks or weatherstripping.
The National Park Service’s wooden-window brief recommends evaluating windows individually and recording their condition. Paint failure alone does not establish that the underlying wood is beyond repair. This makes a window-by-window list more useful than assuming every opening needs identical work.
For glazing work, specify the actual compound and its preparation, priming and painting requirements. A general promise to paint it “after it skins” is not enough; products and conditions differ. The planned finish must work with the glazing system and preserve the window’s intended movement and drainage.
Agree on which operable windows will be checked before and after work, how existing sticking or damage will be recorded, and how openings will be secured if components are removed. Keep painting and any specialist restoration responsibilities clear. The historic wood-window guide provides a more detailed scope checklist.
Porches, steps and columns need their own scope
A porch combines surfaces exposed to weather, surfaces people walk on and components supporting loads. Its floor, stair treads, railings, columns, ceiling and decorative trim should be separate line items. The main siding coating is not automatically suitable for all of them.
The National Park Service’s porch guidance calls for assessment of the structure as well as the visible woodwork. Significant decay, failed joints or movement can require evaluation by a professional familiar with older buildings. A soft column base should not simply be filled and painted without understanding its role and condition.
Once the repairs are resolved, specify a suitable coating for walked-on surfaces and follow its return-to-use instructions. Discuss wet conditions and slip resistance for the chosen system. Identify any underside, concealed face or inaccessible area that is outside the painting scope.
For a porch that serves as the main entrance, settle the access plan early. Stages may be needed to preserve a usable entrance while repair materials and coatings become ready for service. Let the schedule follow those requirements rather than promising that a dry-looking floor can immediately take normal traffic.
Check the property’s preservation requirements in Leavenworth
A historic-looking house and a formally designated property are not the same thing. Check the actual address and proposed work before replacing architectural details or making other changes that may require review.
The City of Leavenworth’s historic-preservation page says proposed changes to listed properties, properties within registered historic districts and Local Landmarks require state-law review and/or a Certificate of Appropriateness. It directs owners to contact staff to establish the needed level of review.
Describe the work specifically: maintenance repainting, paint removal, replacement siding, window changes and porch repairs are different proposals. Ask which parts need review and when. Include any approved details or conditions in the project documents before those portions of the work begin. This is more reliable than assuming every old house needs the same approval or that a familiar neighborhood name settles the question.
Choose colors around the house you have
Start with permanent materials: roofing, brick, stone, foundation and any finishes that will remain. Then decide which architectural features deserve emphasis. A body color, trim color and selected accent can be tested together without making every bracket, panel or spindle a separate color.
A manufacturer’s historic palette can suggest a coherent combination; it does not prove those colors originally appeared on your house. If reproducing a specific historic finish is the goal, arrange the appropriate investigation before removing the paint evidence. Existing photographs and records can help frame that work, while old color photographs and exposed paint fragments have their own limits.
Our Victorian house-color guide explains how to build and test a palette. View physical samples on the building in sun and shade, alongside the materials that will stay. Confirm the actual exterior product and formula, particularly where later additions or replacement siding introduce different coating restrictions.
For previously painted masonry, consider why it was painted before proposing removal. The National Park Service’s masonry guidance explains that an existing painted finish may have historical or practical reasons to remain. Painting unpainted brick or stripping painted brick should be a separate informed decision, not an automatic part of a wood-trim color change.
Budget for the preparation and details, not floor area alone
For early budgeting, $9,000–$18,000 is an illustrative whole-exterior range for a pre-1900, two-story wood-sided house. Your quote depends on its measured surfaces, condition, details, access and repair scope. The house-painting cost page explains the broader cost framework.
A house’s interior square footage does not measure its exterior detail. Window count, porch elements, gables, height, access, coating condition and repair needs can matter as much as wall area. Extensive removal or restoration may change both price and schedule.
For a useful comparison, ask each proposal to separate:
- The defined painting surfaces and preparation level.
- Identified repairs and who performs them.
- Allowances for work whose extent cannot yet be confirmed.
- Required lead-related work and any specialist services.
- Access equipment and protection arrangements.
- Optional restoration or appearance upgrades.
Avoid comparing only the total. One price may cover preparation of intact siding, while another includes substantial window or porch work. If the budget cannot cover everything together, discuss a sequence that addresses active deterioration first and gives each phase a complete, clearly defined stopping point.
Agree on a work sequence and a finish standard
A useful schedule distinguishes assessment, any required review, repairs, preparation, primer, finish coats and the final walkthrough. Drying and curing requirements can create gaps between active work stages. The exterior-season guide explains why the forecast must be considered alongside the exact coating requirements.
Before work begins, decide how entrances, deliveries, children and pets will be managed. Identify any windows needed for ventilation, areas requiring secure overnight closure, fragile landscaping and objects that must be moved. If interior work is included, our interior painting page and old-plaster guide address those separate preparation decisions.
Use the agreed sample to judge the finish, including the expected visibility of old paint edges and repaired areas. At handoff, keep the product and color schedule, repair locations, approved changes, care instructions and any written warranty terms. Record unresolved items individually so “nearly finished” does not leave the final details unclear.
Historic-home painting questions
Does all the old paint have to come off?
No. The scope depends on coating adhesion, wood condition, the desired finish and the applicable work requirements. Sound layers may remain. Extensive removal needs a reason and an agreed method; it is not the default definition of good preparation.
Can original windows be repainted without replacing them?
Often the first step is assessing each window’s paint, wood, glazing and operation. Repainting and restoration are different scopes. Identify the parts and repairs required before deciding whether replacement is necessary.
Does every old house need oil-based primer?
No. Select primer for the substrate, existing coating, staining and chosen finish system. The house’s age alone does not determine the correct product.
Can you quote painting before all the repairs are known?
An initial painting scope can identify the visible work, repair assumptions and unresolved areas. The final agreement should explain allowances and how additional damage will be assessed and approved. Structural uncertainty should be resolved before coating the affected component.
Must I use historically documented colors?
That depends on your goals and any requirements applying to the property and project. A sympathetic modern palette and a documented restoration are different choices. Confirm any review requirements with city staff before committing to regulated changes.
How long will an old-house repaint take?
The number of details, repair scope, lead-related arrangements, access and product requirements determine the working time. Weather and required reviews can affect calendar time. Request a staged estimate instead of assuming that every house of a certain age takes the same number of weeks.
Get a quote for your older Leavenworth home
Describe the siding, windows, porch and trim you want included. Tell us which details you want to retain, where paint is failing, whether repairs are already planned, and whether you know of a historic designation.
Keep wide exterior views, detail photos and any previous paint or repair records ready for follow-up. Those details help turn “paint the old house” into a clear scope with the right preparation, repair decisions and finish expectations. See the service area for nearby communities.