
LEAVENWORTH PAINTING · KANSAS
Cabinet painting in Leavenworth, KS
Cabinet painting gives sound cabinet boxes and doors a new color without changing the kitchen layout. Leavenworth Painting paints kitchen cabinets, islands and bathroom vanities across Leavenworth County. The important decisions come before the spray gun: whether the existing surface can hold a coating, how much grain you want to see, which parts are included and how the kitchen will work while the finish hardens.
Start with photographs of the whole kitchen, a door front and back, the sink cabinet and any peeling edges. We can use those to prepare for a walk-through. For budgeting, a typical kitchen of 25–35 doors and drawer fronts has a $4,000–$7,500 planning range; preparation, exposed box surfaces and the finish you choose determine the written scope.
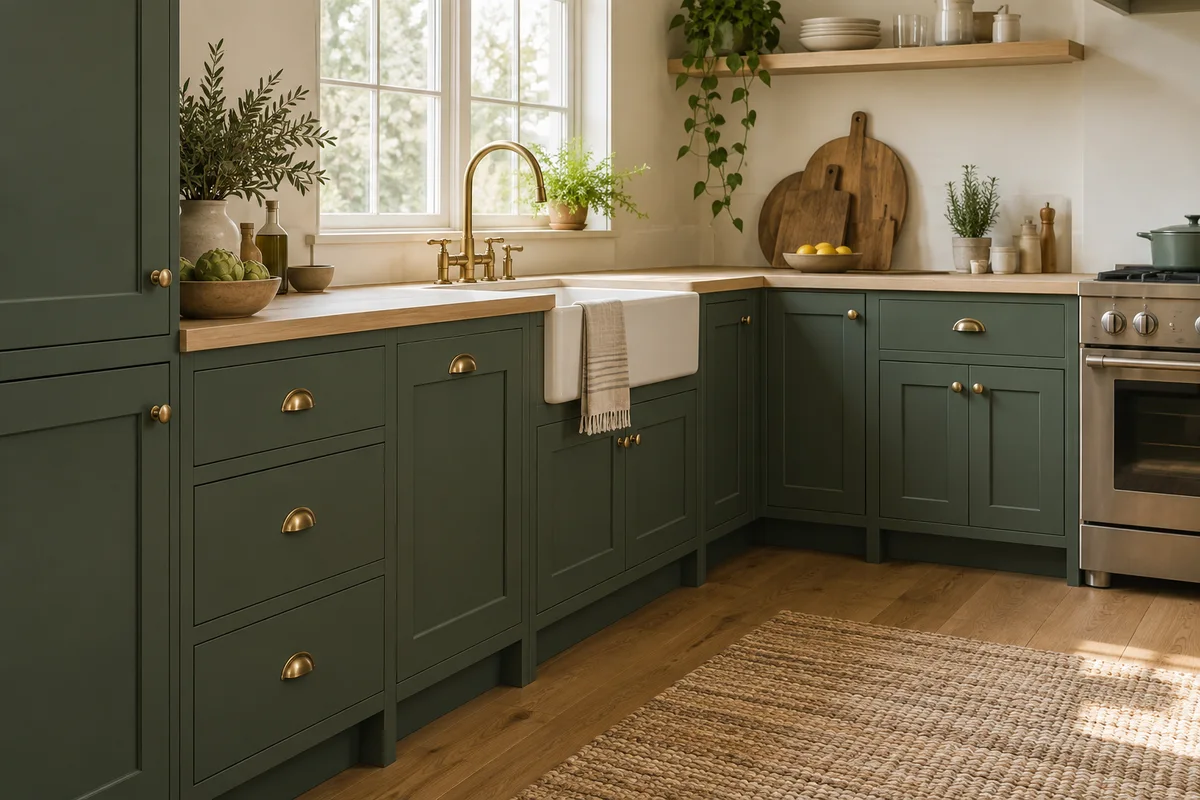
Painting, refinishing, refacing or replacing: what each one really costs
Choose the result first. Painting changes color and sheen while keeping the existing door style. Restaining aims to preserve visible wood. Refacing changes the doors and exposed cabinet faces while keeping sound boxes. Replacement changes the cabinets themselves and can address a layout that no longer works. These are different projects, even when an estimate calls all of them “refinishing.”
| Option | What changes | Typical kitchen planning range |
|---|---|---|
| Painting | Existing doors and boxes receive a prepared, compatible paint system | $4,000–$7,500 |
| Refinishing to a new stain | Existing finish is removed or otherwise prepared for the selected stain/clear-finish system | $5,000–$9,000 |
| Refacing | New doors and drawer fronts; exposed faces of sound boxes are coordinated | $9,000–$16,000 |
| Replacement | New cabinets and installation; layout, counters or plumbing may also change | $18,000–$35,000+ |
These are planning ranges, not interchangeable bids or a quote for your kitchen. Door counts, inside surfaces, end panels, hardware, repairs and counters must be compared on the same basis. See the full painting cost guide for the wider project.
Cabinet restoration is an especially loose term. It can mean repairing a worn clear finish, cleaning and recoating it, or stripping and refinishing. Tell us whether you want to keep visible wood or cover it with an opaque color. This service is cabinet painting; a stain-restoration or refacing request needs a separately defined scope before it can be priced.
Paint cannot make an arched door square, change a cramped layout or restore strength to a swollen cabinet box. If those are the problems, compare refacing or replacement before buying a coating job. A lighter stain is also not simply a lighter paint color: wood species, the existing stain and how much finish can safely be removed all affect the result.
Which cabinet materials are worth painting?
Sound material and a firmly attached existing finish matter more than the age of the kitchen. Look at the door edges and backs, the sink base, appliance-adjacent panels and hinge screws. A beautiful topcoat cannot hold together a loose surface underneath it.
| What you have | What to inspect | What it means for the decision |
|---|---|---|
| Solid wood | Loose joints, splits, warping, old finish and open grain | Often a useful candidate when structurally sound; grain and joints remain part of the finish discussion |
| Wood veneer over plywood or another core | Lifting edges, bubbles, thin veneer and water damage | Sound veneer may be coated; sanding through it or coating loose veneer creates a different repair problem |
| MDF | Swollen edges, damaged profiles, water exposure and loose hardware | A sound factory face and a damaged absorbent edge need different preparation; paint does not reverse swelling |
| Laminate | Bond to the core, slick surface, edge damage and primer adhesion | Requires a system suited to that surface and a test area; “bonding primer” is not a universal guarantee |
| Thermofoil or wrapped doors | Lifting film, heat damage, shrinkage and the underlying core | Peeling film must be addressed as a material problem; spraying over it does not fix the bond |
| Previously painted cabinets | Flaking, soft or tacky layers, chips down to the original finish | Establish which layer is failing before deciding how much existing coating can remain |
If a door rubs, a hinge is loose or a drawer scrapes now, identify that before painting. Adding a coating does not fix alignment and can make a tight contact point more noticeable. Photograph damage with the door open as well as closed; a close-up of the front alone can hide the cause.
How we paint cabinets, step by step
The work separates into assessment, surface preparation, the coating system and careful reassembly. The written scope should describe each stage and identify the pieces that will be finished in place versus removed. It should also say whether interiors, shelves, end panels, toe kicks, crown and the island are included.
- Count, label and protect. Count doors and drawer fronts separately. Label removable pieces and hardware so they return to the right opening. Protect counters, appliances, floors and adjoining rooms; plan access before masking begins.
- Clean before sanding. Cooking grease, hand oils, furniture polish and cleaner residue can interfere with adhesion. Clean using the method suitable for the existing surface and selected coating, remove residues as instructed and allow it to dry. Sanding a dirty surface can spread contamination instead of removing it.
- Check the existing bond. Loose finish must be dealt with before a new layer is added. Test a discreet area with the proposed preparation and primer. A successful test does not turn deteriorated veneer or swollen MDF into sound material, but it can expose an incompatible coating choice early.
- Repair and establish the agreed texture. Address repairable dings and old hardware holes, then prepare the surface according to the system. Decide on oak grain before primer. Fine profiles, veneer and factory faces need controlled preparation rather than an indiscriminate sanding pass.
- Prime for the actual problem. Slick-surface adhesion, exposed absorbent material and stains are different tasks. Select a primer compatible with the substrate and topcoat; confirm whether the same product handles every issue on the job. A bonding claim alone does not establish stain blocking.
- Apply the specified finish. Use a cabinet/trim coating suited to the preparation and application method. Follow its coverage, film-build and recoat directions. Heavy coats are not a shortcut to a smoother, harder finish.
- Allow handling time, then reassemble. Move doors only when the finish can tolerate handling. Rehang and adjust, check rubbing points, install agreed hardware and bumpers, and inspect under the kitchen’s normal lighting. Cleaning and full-use instructions are separate from the installation date.
Sherwin-Williams’ cabinet preparation guide includes cleaning and a test of primer adhesion. Benjamin Moore’s professional cabinet refinishing guidance also emphasizes preparation and allowing the coating to develop before returning cabinets to service. The exact product instructions govern the job.
Primer, enamel and application: what belongs in the quote?
A paint brand is only the beginning of a specification. Ask for the primer, topcoat line, sheen and the surfaces each will cover. “Premium paint” does not tell you whether the coating is intended for cabinets, how it bonds to an old clear finish or how long it needs before doors can be stacked, rehung or cleaned.
Sherwin-Williams Emerald Urethane Trim Enamel is one example of a cabinet/trim enamel. Benjamin Moore also publishes cabinet-system guidance. Product examples help compare specifications; the quote needs to identify the actual system selected for your cabinets. A schedule from one enamel should never be borrowed for another product or sheen.
| Ask for this detail | Why it changes the result |
|---|---|
| Existing finish and proposed preparation | A new system relies on the soundness of what remains underneath |
| Primer and its job | Adhesion, stain blocking and sealing absorbent repairs are separate requirements |
| Topcoat, sheen and application method | Defines the finish to compare on a sample and the instructions to follow |
| Included surfaces | Door fronts, backs, box faces and interiors are not the same amount of work |
| Coats and manufacturer’s coverage/film requirements | “Two coats” alone does not establish correct application |
| Handling and cleaning instructions | Prevents the return date from being mistaken for full cure |
Spray versus brush is a finish choice, not a complete quality test. Spraying can produce an even surface on removable doors, but needs controlled application and overspray protection. Brushing suitable enamel onto fixed boxes can be practical. Either method depends on preparation, application thickness and drying conditions. Compare a finished sample in the sheen you want instead of relying on the phrase “factory finish.”
The oak grain question
Paint changes oak’s color but does not automatically fill its open grain. You can choose a painted surface that retains the wood texture, or specify additional grain filling to reduce it. The difference is most visible in side light, on a dark color and in a shinier finish.
| Finish choice | What you should expect | What to agree before work |
|---|---|---|
| Painted, visible grain | An opaque color with the wood’s texture still readable | Look at a representative door under side light |
| Grain reduced with additional filling | A smoother-looking surface; pores and joints may still be visible | Extent of filling, sample acceptance and additional preparation scope |
| Different door material or style | A different starting surface and profile | Compare door replacement/refacing as a separate project |
Filling is an added preparation operation, not something that the topcoat will reliably accomplish by itself. Approve a sample that includes the full preparation, primer, color and sheen. A tiny color swatch does not show how grain or door joints will look across a finished kitchen.
Wood doors can also have joints between rails, stiles and a center panel. A fine line at a moving joint is different from peeling between coating layers. Discuss which joints will be treated and what movement can remain visible; filling every joint rigidly does not stop the wood from moving.
Dry, recoat, handle, cure — four different things
A finish can feel dry before it is ready for handling or normal cleaning. Those milestones must be read for the exact coating and the actual conditions. Door surfaces in a controlled work area and fixed boxes inside your kitchen may dry differently.
| Milestone | What it allows | What it does not establish |
|---|---|---|
| Dry to touch | The manufacturer’s initial surface-dry stage | Permission to press, stack, scrub or close coated surfaces tightly together |
| Recoat | The next compatible coat can be applied under the stated conditions | Readiness to rehang or use the finished cabinet |
| Handle and rehang | Careful movement and assembly when the finish can tolerate them | Full hardness or resistance to bumpers, fingernails and cleaning |
| Return to gentle use | Limited use under the selected system’s care instructions | Permission to use abrasive cleaners or expose fresh finish to prolonged water |
| Full cure / normal cleaning | The manufacturer’s specified development and care stage | A guarantee against leaks, impact, heat or incompatible cleaners |
Exact hours depend on the product, film thickness, temperature, humidity and ventilation. Confirm the chosen system’s recoat, handling and cleaning instructions before the job begins. If the data sheet does not specify a handling or full-cure time, obtain that guidance from the manufacturer rather than substituting an arbitrary overnight, two-week or month-long rule.
During early use, close doors gently, prevent water from standing at sink-side edges and use only the cleaning method allowed by the finish instructions. Keep the paint brand, product, sheen, color and date with the care record; the color name alone is not enough for a later repair.
Timeline and kitchen downtime
The planning window for a typical kitchen is 5–8 working days, with additional time possible for repairs, grain filling and the selected coating system. A workday estimate describes the project sequence; it is not a promise that every coating is fully cured when the doors go back on.
| Stage | What changes in the kitchen | What to plan |
|---|---|---|
| Preparation and removal | Doors and hardware are removed; work areas are protected | Empty agreed shelves and drawers; keep labeled hardware together |
| Fixed-box preparation and coating | Masking and wet surfaces restrict access | Arrange meals, appliance access and safe routes before the work starts |
| Door finishing and drying | Removable pieces are away from their openings | Keep children and pets away from work and drying areas |
| Reassembly and inspection | Doors, hardware and bumpers are fitted and adjusted | Check alignment, coverage and agreed appearance under normal lighting |
| Early use | Finish continues to develop | Follow the product-specific handling and cleaning instructions |
Agree on when the stove, sink and counters can be used. That depends on the day’s work, masking, ventilation and the products in use. Agree on access and meal arrangements in advance. Drying time is part of the job; compressing the calendar by recoating too soon can create a larger repair later.
Price per door and what moves it
Piece counts are a useful starting point, but a full kitchen is not simply the door price multiplied by the number of doors. Fixed boxes, end panels, protection, preparation, setup and reassembly also contribute. Ask for the total scope as well as the piece count.
| Item | Planning range |
|---|---|
| Cabinet door | $100–$150 |
| Drawer front | $50–$80 |
| Island added to kitchen scope | $600–$1,200 |
| Bathroom vanity | $500–$900 |
| Typical kitchen, 25–35 pieces | $4,000–$7,500 |
| Large kitchen, 40–50 pieces | $6,500–$10,000 |
The main cost questions are grain filling, detailed profiles, damaged coatings, grease or polish contamination, color changes, two-tone layouts, hardware-hole changes, decorative trim and exactly which inside surfaces are included. Ask how an unexpected loose coating or damaged panel changes the quote before it becomes an extra charge.
The instant estimator prices interior walls, ceilings, baseboards and door faces; it does not calculate cabinets. Use it for adjacent kitchen walls or other rooms and request cabinet pricing from the piece count, condition and walk-through. Include the piece count and condition in your quote request, and have full-kitchen photographs and close-ups ready for the follow-up.
Cabinets in older Leavenworth houses
Original built-ins and old painted trim deserve a separate assessment from a newer kitchen. Keep the house’s age, old finish layers and the value of original stained wood in the conversation. An attractive old clear finish may be worth preserving rather than covering with paint.
For pre-1978 housing, identify the applicable lead-safe requirements before sanding or disturbing painted surfaces. A cabinet’s apparent age or a single visible topcoat does not establish whether older layers contain lead. Kansas administers its own program; see KDHE’s licensing and certification information and our lead-paint guide. This is also a reason to have preparation methods settled before work begins.
Cabinet painting questions
Can you paint laminate or thermofoil cabinets?
Some sound manufactured surfaces can accept an appropriate coating system, but peeling film, damaged edges or a swollen core need a material repair or replacement decision first. Identify the surface and test the proposed system before committing to a full kitchen.
Will painted oak look completely smooth?
Not from paint alone. Open grain usually remains visible. Additional grain filling can reduce texture; agree on a representative full-system sample and the preparation scope before choosing that finish.
Do you refinish or restore stained cabinets?
This page covers opaque cabinet painting. If you want visible wood or a different stain, describe that result in your inquiry so the work can be assessed and scoped separately. “Refinishing” can refer to several different processes.
How long will the finish last?
There is no dependable universal lifespan for every kitchen. Preparation, adhesion, water at sink edges, cleaning products, rubbing doors and impact all matter. Keep the care instructions and inspect high-touch areas; do not treat a general lifespan estimate as a warranty.
When can I use the kitchen again?
Agree on access during the job, then follow the selected finish’s handling and cleaning instructions. Rehanging, gentle use and full cure are different milestones; the schedule above explains what to confirm.
Is painting cheaper than refacing?
It usually retains more of what you already own, and the planning ranges above are lower. Compare matching scopes: a paint bid that excludes box interiors, repairs or hardware changes is not equivalent to a refacing bid that includes them.
Cabinet decisions in more detail
- Agree on painted oak grain and a finish sample: compare the texture you want with the preparation included.
- Read cabinet paint and primer specifications: identify the exact coating system and its application and care intervals.
- Diagnose peeling cabinet paint: organize the failure clues before choosing a repair or another topcoat.
Plan the rest of the project
Not ready to request a quote? Start with the complete Leavenworth house-painting planning guide, compare the interior painting scope for surrounding rooms, or use the painting quote checklist.