
PAINTING TROUBLESHOOTING · LEAVENWORTH
Why exterior paint peels or blisters
Leavenworth Painting · Published October 28, 2026
Exterior paint peels when a coating loses its bond to the surface or to another paint layer. Moisture, contamination, a weak older finish and unsuitable application conditions can all contribute. Blisters are raised pockets of coating; they can also have more than one cause. Before choosing a primer or another topcoat, establish what is separating and why.
A photograph can help locate the problem, but color, wall direction or the age of the paint alone cannot prove the cause. This guide helps you organize the evidence for an exterior painting assessment and compare a repair proposal with a simple cover-up.
Record the pattern before disturbing the paint
Start from the ground or another safe position. Note which wall is affected, the nearest window or roof intersection, whether the damage is isolated or widespread and when it first appeared. Keep overview photos as well as close-ups; a tight picture of a flake can miss the overflowing gutter above it.
Useful timing questions include whether the finish failed shortly after repainting, after a leak, following a wet period or gradually over several seasons. Record any known product, preparation and application dates. If one repair repeatedly fails, keep the earlier photographs and invoices too.
For a pre-1978 home, do not scrape, sand or break a blister to investigate on your own. Resolve the Kansas lead-paint requirements first. An inspection can be planned without turning diagnosis into uncontrolled coating removal.
The layer that releases changes the investigation
Imagine the wall as a stack: siding, earlier coatings, a recent primer and the latest topcoat. Failure can occur at more than one interface. A qualified inspection of the failed area and surrounding material helps determine where that stack is weak.
| Observed pattern | Possible line of investigation | What appearance alone cannot prove |
|---|---|---|
| Bare wood exposed below lifted layers | Moisture, weathered wood or a weak bond to the original surface | That the newest paint is defective |
| New paint separates while an older color remains | Compatibility, cleanliness, gloss or adhesion between coats | That all retained old paint is sound elsewhere |
| Several old layers release together | Weakness deeper in the existing coating system | That a bonding primer over the top would stabilize it |
| Bubbles form during or soon after application | Surface heat, moisture, contamination or application conditions | One cause without examining the timing and failure layer |
| Failure repeats near one sill, gutter or penetration | A recurring local water route or detail defect | That repainting the entire house is necessary |
| Similar failure spreads across many surfaces | Common preparation, coating or weather factors | Which factor is responsible without further assessment |
The table is a set of questions, not a diagnostic test. Several causes can coexist on the same house. A broad repaint may still need local repairs at the worst areas.
Trace water before blaming the paint
Look for gutter overflow, roof leaks, failed joints, splashback and surfaces that stay wet. Water can arrive behind the coating from another part of the assembly. Interior moisture can also contribute to exterior failures, so the investigation may extend beyond the visible wall.
Sherwin-Williams’ exterior moisture-peeling guidance identifies damp substrates and several water-entry routes as possible causes. That supports investigating the source before repainting; it does not mean every peeling patch proves a leak.
Ask what evidence supports the proposed cause. “This is the west wall” is an observation, not a complete diagnosis. “The failure is concentrated below this leaking joint, and the wood remains wet while adjacent areas have dried” is a more useful starting point, but the joint and surrounding assembly still need assessment.
If a roofer, carpenter or other trade must correct the problem, list that dependency before the painting start. A moisture-resistant finish is not a repair for active water entry.
Blistering is not always the same failure as peeling
Blistering describes the shape of the lifted film. The manufacturer’s blistering guidance lists heat, moisture, early exposure to dew or rain and contamination among possible causes. It also distinguishes blisters extending to the substrate from those separating at an earlier coat.
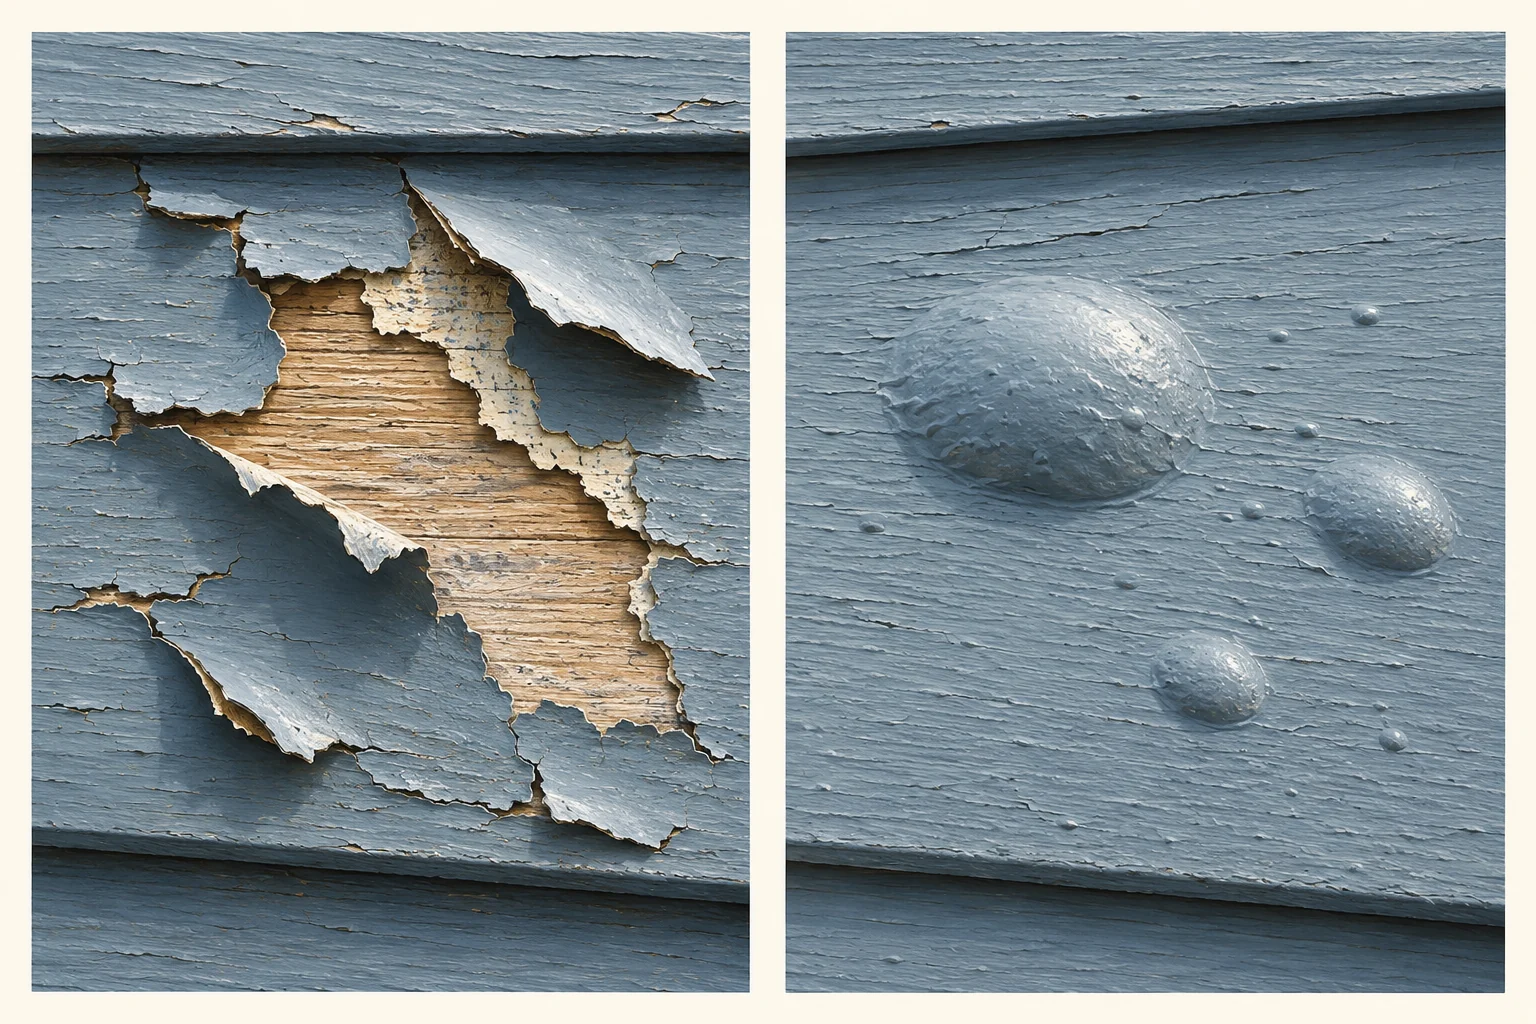
The practical inspection questions are when the bubbles appeared, what surfaces were coated, what conditions prevailed and where the film releases. A recently painted wall in direct sun deserves a different investigation from an older wall with recurring blisters near an interior moisture source.
Flattening a bubble, puncturing it or covering it with another coat does not establish a sound bond. The repair needs to address the failed film and the cause, using methods suitable for the material and lead status. An intact-looking patch nearby may also need assessment before the repair boundary is decided.
Check preparation and the retained coating
Paint cannot bond reliably through dirt, loose chalk or other unsuitable contamination. A surface can look cleaner after washing and still be unsuitable for coating. The preparation plan should explain how cleanliness, soundness and compatibility will be evaluated.
An existing coating can also be the weak link. Applying a strong new finish over a poorly attached old layer leaves that underlying weakness in the system. This is why the question “Which primer is strongest?” can miss the more important question: “What sound surface will that primer actually be bonded to?”
For historic wood, the National Park Service’s paint-problem guidance supports treatment based on condition and avoiding unnecessary removal of sound material. Retaining appropriate old paint and removing failed layers are compatible goals. The scope should explain how it reaches a suitable base without automatically stripping every surface.
See wood-siding paint preparation for the repair, cleaning, drying and appearance decisions that follow this diagnosis.
Review the complete application window
The air temperature at the start of painting is only part of the record. Ask about surface and material temperatures, direct sun, humidity, dew, rain and the conditions during drying. Also identify the primer, repair filler and sealant; their instructions may differ from the finish coat.
Touch dry is not the same as ready to recoat, and neither necessarily means the film has reached its final properties. A coat applied too soon or exposed to unsuitable conditions can complicate the investigation. Use the Leavenworth painting-season guide for an example of how one product’s recoat timing changes with temperature.
Product records matter here. “Premium exterior paint” does not identify the relevant application limits, sheen, base or formula. Keep the actual labels and purchase records with the project notes when available.
What a repair proposal should explain
A useful proposal connects findings to work rather than promising a miracle coating. Ask for a written description of:
- The suspected causes and evidence. Include remaining uncertainty and any further assessment needed.
- The repair boundary. Explain whether work is limited to a patch, component, wall or larger area, and how surrounding adhesion will be assessed.
- Water or material repairs. Identify the trade responsible and the condition required before coating.
- Preparation and retained layers. State what will be removed, what can remain and what appearance to expect.
- The coating system. Name products and assign them to the correct substrates and conditions.
- Application and follow-up. Include suitable weather, drying stages and how the repaired area will be reviewed.
If concealed damage or additional weak layers may appear during preparation, agree on how the scope and price will change. A narrow initial repair can be reasonable when its limits are clear; it should not be sold as a guaranteed diagnosis of the entire house.
Decide between localized repair and a broader repaint
Localized work may be appropriate when the cause is confined, the surrounding coating is sound and the remaining finish is acceptable. A whole-wall treatment can make sense when failure or preparation extends widely or when a small patch would leave an unacceptable appearance. A whole-house repaint requires its own condition and appearance rationale.
There is no fixed number of peeling spots that makes that decision. Access, retained paint, repair extent, color matching and the homeowner’s goals all matter. Ask for alternatives that describe these tradeoffs instead of using a universal repaint-age chart.
If the concern is brown streaking without lifting, read brown stains on exterior paint. Tannin staining and surfactant residue raise different questions from loss of adhesion. For the broader maintenance decision, use how often to repaint.
Describe where the failure occurs and when it began in the quote form. Keep product records and dated photos ready for follow-up, and use the painting planning guide to organize the rest of the project.
Browse the painting guide library for related preparation and finish decisions.