
PAINTING TROUBLESHOOTING · LEAVENWORTH
Why paint touch-ups flash and when to repaint the wall
Leavenworth Painting · Updated October 28, 2026
A touch-up can remain visible even when the paint color is correct. The new area may differ in sheen, texture, thickness or absorption, and light crossing the wall can make that difference obvious. The useful choice is whether a small test blends acceptably or whether repainting the wall to a natural boundary will produce a more consistent result.
Do not keep enlarging a patch simply because the wet paint looks different. Let the selected coating develop as directed, inspect it under the room’s normal lighting, then decide what the next coat is meant to solve.
Work out which mismatch you are seeing
“The color is wrong” can describe several different problems. Look straight at the wall and then from an angle, without changing anything yet.
| Appearance | What to compare | Useful next question |
|---|---|---|
| Patch looks a different color from most positions | Product, base, formula, mixing and the original wall’s condition | Is it the same coating, not merely the same color name? |
| Patch mainly shows when viewed from the side | Sheen, film build and application texture | Is this flashing rather than a color mismatch? |
| Raised or smooth island around a repaired hole | Patch profile and texture compared with the wall | Does the repair need correction before more finish paint? |
| Shiny area where a mark was scrubbed | Cleaning method and wear | Has rubbing changed the original paint’s sheen? |
| Brown or yellow mark returning through new paint | Moisture or other stain source, and the primer system | Has the cause been corrected and the stain treatment selected? |
Sherwin-Williams’ flashing guidance identifies uneven sheen and lists causes including porous surfaces and uneven or insufficient film thickness. That makes it worth examining the repaired surface, not just buying another can of the same color.
Match more than the color name
Find the original product line, sheen, base and color formula if the records are available. Retained paint from the original job may improve the chance of a match, but first check that it remains usable and has been stored according to its instructions. A similar-looking liquid in an old unlabeled can is not a reliable project record.
Benjamin Moore’s touch-up guide emphasizes matching color and sheen, preparing the damaged area and recognizing when the whole wall is the better repaint scope. A color-matching service can help with missing records, but matching a color does not reproduce the original product’s sheen, texture or aging.
Also identify how the original finish was applied. A brush can leave a different texture from a roller or sprayed finish. Sherwin-Williams recommends using the same application tool where possible. The goal is a compatible appearance, not an assumption that every touched-up wall can be made invisible.
Give a repaired patch the same attention as the paint
A hole repair can be flush at its center but leave a ridge around the edge. It can also be smoother or more absorbent than the surrounding surface. More finish paint does not necessarily solve either difference.
Inspect the repair under side light before coating. The preparation should address the profile and texture, and the selected primer should suit the repair and coating system. A damaged drywall area is different from a small scuff on intact paint. If the wall is plaster or the old coating is peeling, start with the plaster assessment guide rather than treating it as ordinary drywall patching.
Keep the repair’s drying instructions separate from its setting time. A material can become firm while still needing time or conditions before it is ready for the next coating. The repair and paint instructions should agree before the wall is finished.
Try a limited test before chasing the whole wall
For sound, dry paint with a small cosmetic mark, first determine whether the mark can be cleaned using the finish’s allowed method. Do not scrub aggressively in an attempt to erase a sheen change. If painting is needed, use a small, inconspicuous test area or an agreed repair location, with the intended preparation and application.
After the coating has developed as directed, judge it from the doorway, the normal seating position and the side-light angle where the mismatch was noticed. Decide whether the result is acceptable for that room. A utility room and a prominent wall facing a large window may warrant different appearance expectations, even though the technical issue is similar.
Avoid universal thinning advice. Some manufacturer touch-up guidance discusses thinning for particular coatings, but another product’s instructions may prohibit or limit it. Use the actual coating directions rather than adding water based on a recipe for a different paint.
When repainting the wall is the more useful scope
Consider a full-wall repaint when there are many repairs, a prominent mismatch persists after a suitable test, the original paint is unknown, or a continuous surface has varied application texture. The boundary can be a corner or another natural break in the surface; it does not necessarily mean repainting the entire house or every room.
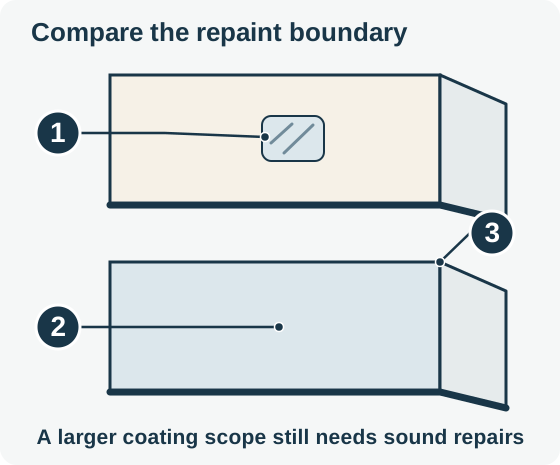
Compare the actual boundaries in the proposal. Shading shows the area included, not a predicted color or a guaranteed repair result.
- Localized touch-up: a limited area is prepared and coated. A suitable test helps establish whether the appearance is acceptable.
- Whole wall: the coating scope extends across the uninterrupted wall face. Underlying repairs still need to be sound and properly prepared.
- Natural boundary: the corner provides a clear stopping point. The adjoining wall, ceiling and trim are separate scope decisions.
Concept references: Dunn-Edwards touch-up bulletin; Benjamin Moore touch-up guidance.
Dunn-Edwards’ touch-up technical bulletin lists porosity, texture, light, film thickness and application among the variables. It also identifies repainting corner to corner as an option when a wall needs excessive touch-up. Its advice supports comparing the larger scope rather than repeatedly expanding a collection of spots.
A full-wall coat still needs the underlying repairs to be suitable. Painting corner to corner will not flatten a raised patch, stop an active leak or attach loose plaster. Define what the larger coat solves—uniform appearance—and what preparation must happen first.
Do not mistake burnishing for a failed touch-up
A shiny area created by cleaning is a change in the existing film, not necessarily a new paint problem. Benjamin Moore describes burnishing or marring as a sheen change caused by rubbing or washing. If the mark grew shinier while it was being scrubbed, more abrasion is unlikely to restore the original appearance.
For a room that repeatedly needs cleaning, compare a product and sheen suited to that use when repainting. The interior sheen guide explains why formulation, surface preparation and care matter alongside the sheen name. Moving furniture away from a rubbing point can also reduce the repeat damage.
Describe the repair before requesting a price
Tell the painter how many walls are involved, whether there are holes or just surface marks, when the room was last painted and whether the original product information is available. Mention whether the wall faces a window and whether the defect is mainly visible from an angle. Keep photographs of the whole wall and close-ups ready for the follow-up.
Ask for the proposed boundary: spot repair, one wall, adjoining walls or the whole room. Also ask whether preparation, primer, matching attempts and any ceiling or trim work are included. The quote-comparison guide helps make those alternatives explicit.
Our interior painting page and room estimator can help organize a repaint, but the estimator does not price specialized matching or substantial repairs automatically. A written scope should settle those details before work begins.
Find more preparation and finish guidance in the painting guide library.